Hi Everyone! 🧡
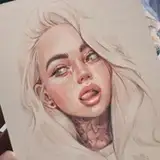
As I promised - I’m sharing with you Step By Step of my first oil painting study 🙌
I tried painting with oils few times when I was a teenager but only for some still life studies. The only thing I remembered was that it’s very pleasant but messy and that the turpentine smell is too strong to use it at home. Some time ago I watched IGTV with Szymon Chwalisz on Paper Concepts Instagram. He’s a painter (working with oil and acrylics) and showed there that oil painting doesn’t have to be messy or smelly 😅 He doesn’t even use turpentine. I was thinking about trying again since then. I’m so happy I finally did! This is so freaking pleasant 😌
And here’s the Step by Step 😉
MATERIALS:
I didn’t wanna use canvas to start practicing. This pad is very good in my opinion and I felt like drawing in a sketchbook 😁 It has nice texture and didn’t get wavy after applying the paint. I have a set of Winsor & Newton - Winton line oil paints recommended by the same painter 👨🎨 😁 I’m happy with them so far.
I have few synthetic brushes in different shapes and sizes. Synthetic brushes are good for smooth blending.
I used low odour solvent which is a great alternative for turpentine (it’s also hypoallergenic). Also linseed oil that helps you to create smooth blending of colors.


COLOR PALETTE 🎨
I didn’t have a proper palette (glass or plexi) so I used cover from the Ikea box. Worked pretty well 😎 I have this porcelain stand from (Paper Concept) but it’s too high for smaller brushes.
Remember to have a piece of cloth to clean your brushes from paint during painting. I had a paper towel this time.
I squeezed four portions of white paint (like a pea grain size) and one portion of each color (besides black). I didn’t know what I’m doing but I just tried to create few skin and lips tones. Used the palette knife for mixing. I tried to create some of them with reddish tinge and some with more yellow/green.
To create black (but not so black as straight from the tube) I used ultramarine and raw umber mix.

1. PENCIL SKETCH
I used this reference because of the beautiful light and shadows on it ☀️🌼🌻
I sketched the portrait with HB pencil. It’s not easy on such strong texture but still ok to erase so it’s fine 🙌

2. STRONGER/LIGHTER
I sketched all the features with pretty strong lines and blocked the shadow areas. Then I rolled the sketch with eraser to make it lighter.

3. WHITE ACRYLA GOUACHE (or acrylic)
You can do the sketch with a light paint but if you prefer pencil like me, you need to impregnate it with a light layer of acrylic mixed with water. I didn’t have acrylic but acryla gouache was fine as well ❄️ If you won’t impregnate the sketch, graphite might react with oils and make colors muddy/ desaturated.
Canvas was a bit wavy from water but then it came back to normal.

4. DARK ELEMENTS FIRST
I wasn’t sure how to start but heard somewhere that from dark elements so that’s what I did 😅 I left light areas white.

5. GENERAL TONES
I painted general, average tones. Wasn’t sure about leaving the white parts so started to cover them with a thin layer of paint.

6. BLENDING
I used small, flat brush with linseed oil to blend borders between colours. I didn’t wanna keep very strong contrasts because they would be like contours and they don’t work in realistic art (in my opinion).

7. LIGHT, CONTRAST AND FRECKLES
I used pure white paint to make highlights and just a small, dirty brush to paint freckles. I kept hair messy and "unfinished" because I liked this effect 😁


I’m so glad you liked it 🍓🤗 I hope the process will be inspiring for you 🌹
Hugs 🧡
Gaby


















![개성인쥬스[pingkypen]](https://naebuka.com/istorage/106895.jpg)